
Date: 2026-07-24
You've definitely had this happen. A circuit board passes every test. It works perfectly. You ship it to your customer. A few weeks later, it fails. You get it back and check — all the joints look perfectly fine. What went wrong?
The problem was hiding in plain sight. Its name is a cold solder joint.
Cold solder joints are one of the most common and deceptive soldering defects in electronics manufacturing. In this guide, I'll explain what a cold solder joint is, what it looks like, how it forms, how to detect it, and how to fix it. Plain English, no fluff.
A cold solder joint is simply a joint where the solder did not fully melt before it solidified. It looks like it's connected, but the solder is just "sitting" on the surface rather than forming a proper metallurgical bond with the pad and lead.
Think of it this way: a good solder joint is like gluing two pieces of wood together — the glue soaks into the wood and dries rock solid. A cold solder joint is like spreading glue on the surface, touching it before it dries — it looks attached, but one good bump and it falls apart.
The scary part? Cold solder joints are masters of disguise. They might conduct electricity at first and pass your tests, but the connection is weak and brittle. After a few weeks of vibration or temperature changes, they finally give out.
Identifying cold solder joints is all about looking closely — with a magnifying glass or microscope. Here's how to tell a cold joint from a good one:
A good solder joint looks like:
Smooth and shiny — like a little mirror
Volcano-shaped — concave sides, solder smoothly feathers onto the pad
Smooth edges — seamless transition from solder to pad
A cold solder joint looks like:
Dull, grainy, and rough — like sandpaper, no metallic shine
Lumpy or ball-shaped — solder is balled up on the pad
Cracks or gaps — you might see gaps or circular cracks
Whitish or bulging — sometimes the joint appears white or swollen
Important: Lead-free solders are naturally duller than leaded solder. So don't rely on color alone — look for graininess and a "dry" appearance. Some good joints aren't super shiny either; what matters is that the surface is smooth and uniform.
The root cause of cold solder joints is simple: not enough heat. Here are the specific ways it happens:
1. Temperature too low
The soldering temperature never reached the melting point of the solder. Maybe the iron was set too low, or the reflow oven's peak temperature wasn't high enough.
2. Not enough time
The temperature was right, but the heat didn't last long enough for the solder to fully melt.
3. Big components steal the heat
Large components (big inductors, heat sinks) soak up heat like a sponge, leaving nearby joints too cold.
4. The joint moved while cooling — disturbed joint
If you bump the board or component while the solder is still molten, the internal crystalline structure fractures. This is called a "disturbed joint" — a type of cold joint.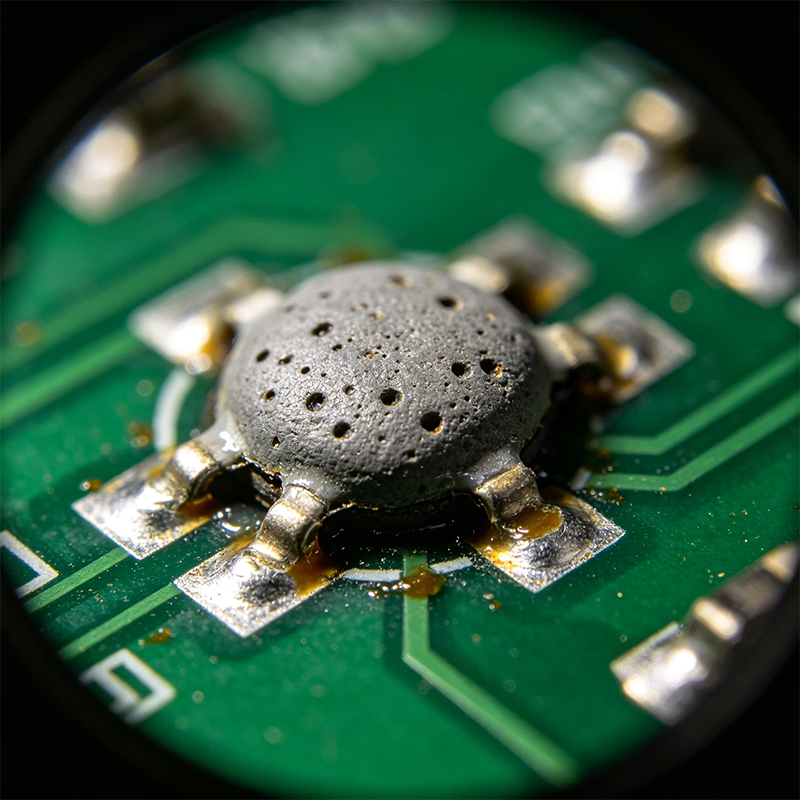
5. Dirty or oxidized surfaces
Oxides or contaminants on the pad or lead prevent the solder from wetting the surface.
6. Cooling too fast
If the joint cools too rapidly, the solder can also take on a "cold" appearance.
The deadliest thing about cold solder joints isn't that they fail — it's that they fool you into thinking everything is fine.
Trap #1: They pass the test
A board with a cold solder joint can pass power-on testing. The joint still conducts — just with high resistance. By the time it fails, the product is already in your customer's hands.
Trap #2: They fail intermittently
When the device heats up, the board expands slightly. Thermal expansion can pull a cold joint apart. Then it cools down and reconnects. These "comes and goes" failures are an absolute nightmare to debug.
Trap #3: They hate vibration
In cars, drones, and aerospace equipment, vibration is constant. Cold solder joints crack under fatigue.
Cold solder joints are sneaky, but not invisible:
1. Visual inspection (with magnification)
Look at the joint under a magnifying glass or microscope — dull? Grainy? Lumpy?
2. The tweezer test
Gently poke the joint with tweezers. If it cracks or moves, it's cold.
3. AOI (Automated Optical Inspection)
AOI machines use high-resolution cameras to check joint shape and wetting angle.
4. X-ray inspection
For hidden joints (like BGAs), X-ray is the only way to check for voids and defects inside the joint.
5. Electrical testing
Measure resistance — cold joints have much higher contact resistance.
If you find a cold solder joint, fixing it is straightforward:
Method 1: Re-heat it
Apply the soldering iron to the joint and let the solder melt and flow again. Adding a little fresh flux helps the solder wet properly.
Method 2: Add fresh solder
While re-heating, add a tiny bit of new solder to improve flow.
Method 3: Remove and re-do
If there's too much solder, use solder wick or a solder sucker to remove the old solder, then solder it fresh.
Important: After rework, re-inspect the joint. It should look smooth and proper.
Prevention is always better than repair. Follow these rules:
1. Use the right temperature
Set your iron at least 15°C above the solder's melting point. For reflow, follow the solder paste manufacturer's profile.
2. Give it enough time
Make sure the solder stays above its melting point long enough to fully melt.
3. Use a clean tip and sufficient flux
A dirty tip won't transfer heat properly, and flux is essential for wetting.
4. Don't move the joint while it's molten
No bumping, no touching — let it cool in peace.
5. Keep surfaces clean
Pads and leads must be free of oxides and contaminants.
6. Train operators
Manual soldering quality depends heavily on operator skill and experience.
In electronics manufacturing, cold solder joints are judged by IPC-A-610 standards. Products are divided into three classes:
Class 1 (General Electronics) : Function is all that matters — minor cosmetic defects may be acceptable
Class 2 (Dedicated Service Electronics) : Requires reliable operation — cold joints are classified as "defective" and require rework
Class 3 (High-Reliability) : Aerospace, medical, defense — the strictest standards
The companion standard is IPC-J-STD-001, covering soldering process requirements.
A cold solder joint is a joint where the solder didn't fully melt before solidifying. It looks dull and grainy, balled up on the pad instead of flowing smoothly. It might pass your tests, but it's weak and brittle — and it will fail when you least expect it.

Kaboer manufacturing PCBs since 2009. Professional technology and high-precision Printed Circuit Boards involved in Medical, IOT, UAV, Aviation, Automotive, Aerospace, Industrial Control, Artificial Intelligence, Consumer Electronics etc..


 English



 Wechat
 +86 13670210335
 +86 13670210335
 E-mail