
Date: 2026-07-11
You’ve definitely seen it done before — a soldering iron touches a pad, silver solder wire melts, and a shiny little joint appears. Clean, fast, professional. But when you try it yourself, the solder balls up, refuses to stick to the pad, and the joint looks like a blob of bird droppings.
Soldering wire to a PCB is the most basic and most important skill in electronics — whether you’re building a DIY project, repairing a broken headphone, or working in electronics manufacturing. In this guide, I’ll walk you through everything from tool selection to troubleshooting, in plain English. No fluff.
You don’t need expensive gear to get started. Here’s the basic kit:
Soldering Iron: A temperature-controlled iron is highly recommended — 40W-60W is plenty. Set it to 320°C-350°C for leaded solder, or 360°C-380°C for lead-free solder. A regulated iron keeps the temperature consistent and won’t burn your pads.
Solder Wire: Use flux-core solder wire (the kind with flux built inside). 0.6mm-0.8mm diameter is great for beginners — thin enough for fine work but thick enough for general use.
Flux: Although your solder wire has flux inside, a small bottle of liquid flux or flux paste is a lifesaver. When solder won’t flow, a tiny drop of flux fixes it instantly.
Iron Stand and Sponge: A stand to hold the hot iron, plus a wet sponge (or brass wool) to clean the tip.
Desoldering Braid and Solder Sucker: For fixing mistakes or removing excess solder.
Tweezers: For holding small components and positioning parts.
Magnifying Glass or Good Light: To see fine pads and tiny pins clearly.
Preparation is half the battle. Skip these steps and your joints will be ugly.
1. Clean the pads and component leads
This is the most overlooked step. Oxides and oils on the surface prevent solder from sticking. Wipe the pads with alcohol or apply a little flux to remove oxidation and contaminants.
2. Tin the iron tip
A new or unused tip is “hungry” — it’s oxidized and won’t take solder. Heat the iron to working temperature, wipe it clean on a wet sponge, then melt a little solder onto the tip so it’s evenly coated. This is called tinning the tip. A tinned tip transfers heat better, takes solder more easily, and lasts longer.
3. Secure the board
Use a PCB holder or double-sided tape to keep the board steady. You need one hand for the iron and one for the solder wire — the board shouldn’t move.
4. Pre-heat (optional)
For large pads or ground-connected pads (which sink heat quickly), you can pre-heat the pad with the iron for 1-2 seconds before feeding solder.
Here’s the proper technique, step by step:
Step 1: Heat the pad and the lead
Place the soldering iron tip so it touches both the pad and the component lead at the same time. Heat for 1-2 seconds. The tip must touch both — heating only the pad won’t wet the lead, and heating only the lead won’t wet the pad.
Step 2: Feed the solder
Keep the iron in place and feed the solder wire into the junction where the iron tip, the pad, and the lead meet. Don’t feed solder directly onto the iron tip — many beginners do this, and the solder melts and drips onto the pad, creating a cold joint.
Step 3: Let the solder flow naturally
When the solder hits the heated pad, it melts and flows on its own. Stop feeding when the solder just covers the pad and the lead — no more.
Step 4: Remove the solder wire, then the iron
Order matters — remove the solder wire first, then remove the iron. If you remove the iron first, the solder will “draw” a spike. The sequence: feed → stop feeding → remove wire → remove iron.
Step 5: Inspect the joint
After the joint cools (a few seconds), inspect it. A good joint is shiny, smooth, and volcano-shaped, with solder flowing evenly over the pad and the lead. If it’s dull, grainy, and balled up, that’s a cold solder joint — reheat it and let it flow again.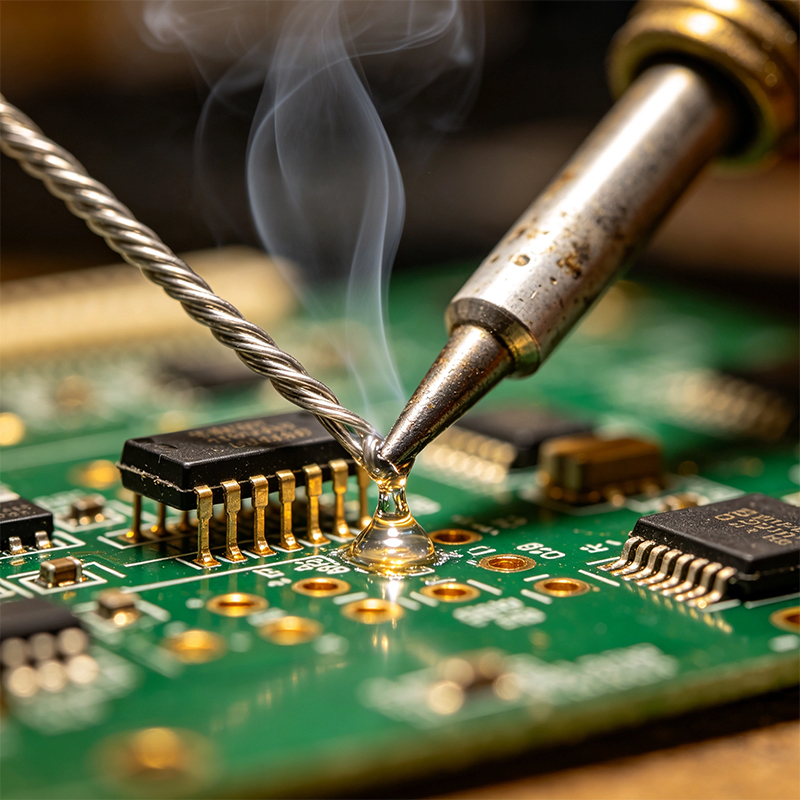
1. Solder balls up and won’t flow
Cause: Oxidized pads/leads, or not enough heat. Fix: Apply a drop of flux, or increase iron temperature by 20°C. If that doesn’t work, use desoldering braid to remove the old solder and start over.
2. Solder sticks to the iron tip instead of the pad
Cause: Dirty or oxidized iron tip, or dirty pads. Fix: Clean the tip on a wet sponge and re-tin it. Clean the pad with alcohol.
3. Solder joint looks like a ball (bird dropping)
Cause: Too much solder, or held the iron too long. Fix: Use desoldering braid to remove excess solder, then solder it again.
4. Dull, grainy joint (cold solder joint)
Cause: Insufficient heat — the solder didn’t fully melt before solidifying. Fix: Reheat the joint and let the solder flow again.
5. Pad lifted off the board
Cause: Too much heat or held the iron too long. Fix: Lower the temperature and reduce heating time. A lifted pad is hard to repair — if it’s a small pad, you can run a wire to the nearest via or pad.
Your choice of solder wire makes a huge difference:
| Feature | Leaded (63/37) | Lead-Free (SAC305) |
|---|---|---|
| Melting point | 183°C | 217-221°C |
| Recommended iron temp | 320-350°C | 360-380°C |
| Difficulty | Easy | Harder |
| Joint appearance | Shiny | Dull |
| Beginner friendly? | ✅ Yes | ❌ No |
Start with leaded solder to learn — it’s forgiving and works beautifully. Switch to lead-free once you’ve mastered the basics. The full process — solder paste printing, placement, reflow, AOI inspection — is what PCBA factories handle.
Soldering is safe if you follow a few simple rules:
Ventilation: Solder fumes aren’t good for you. Work in a well-ventilated area, preferably with a fume extractor.
Don’t touch the hot tip: The iron is 300°C+. Put it back on the stand when not in use.
Wash your hands: Leaded solder contains lead. Always wash your hands after soldering, especially before eating.
Protect your eyes: Solder can sometimes splatter. Safety glasses are a good idea.
Soldering wire to a PCB is three simple steps: heat the pad and lead → feed the solder → remove the wire then the iron.
A good joint is shiny, smooth, and volcano-shaped. A bad joint is dull, grainy, and balled up — that’s a cold solder joint. Start with leaded solder, 0.6-0.8mm diameter, at 320-350°C.

Kaboer manufacturing PCBs since 2009. Professional technology and high-precision Printed Circuit Boards involved in Medical, IOT, UAV, Aviation, Automotive, Aerospace, Industrial Control, Artificial Intelligence, Consumer Electronics etc..


 English



 Wechat
 +86 13670210335
 +86 13670210335
 E-mail